|

|
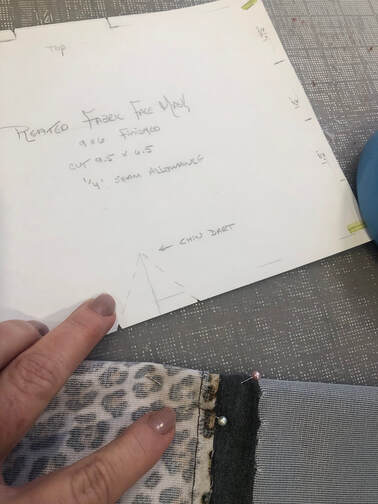
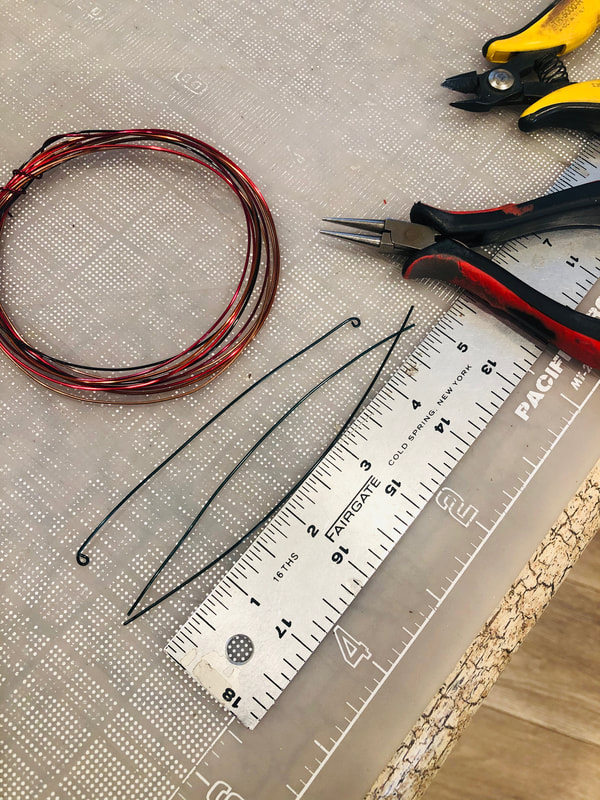
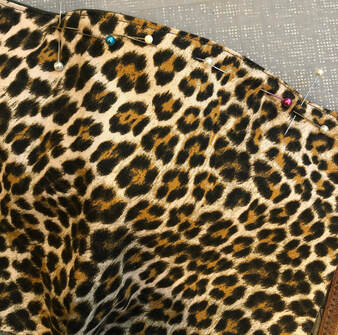
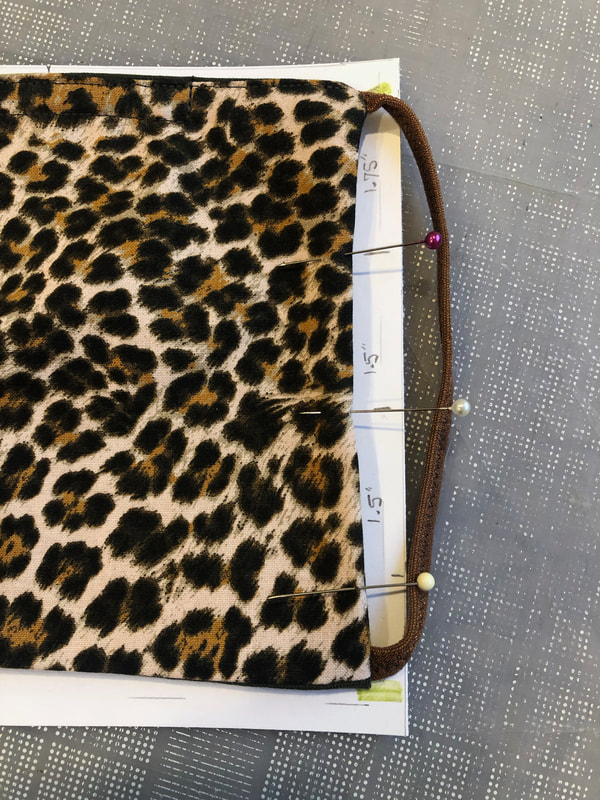
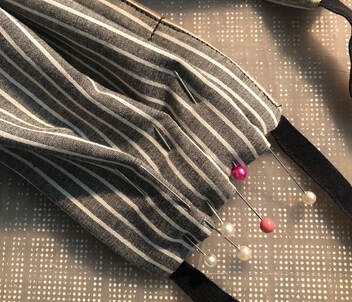
We're in an entire new world now. Last week the CDC advised us to wear a cloth mask or some form of facial covering to help protect us and others while making a trip to the market, bank or when physical distancing is not possible. When we started the "Shelter in place" in March I knew I needed to get out my handy sewing machine and start to create cloth face masks, non-medical. There is a shortage of medical PPE and we want to save them for Health Care Workers. I've used the basic Pleated Pattern from Vanderbilt University with an addition of a dart at the chin and wire at the bridge of the nose that can be molded to your face. I find it holds the mask closer so you can see easier. Here's a DIY for a fabric mask. We're all in this together! 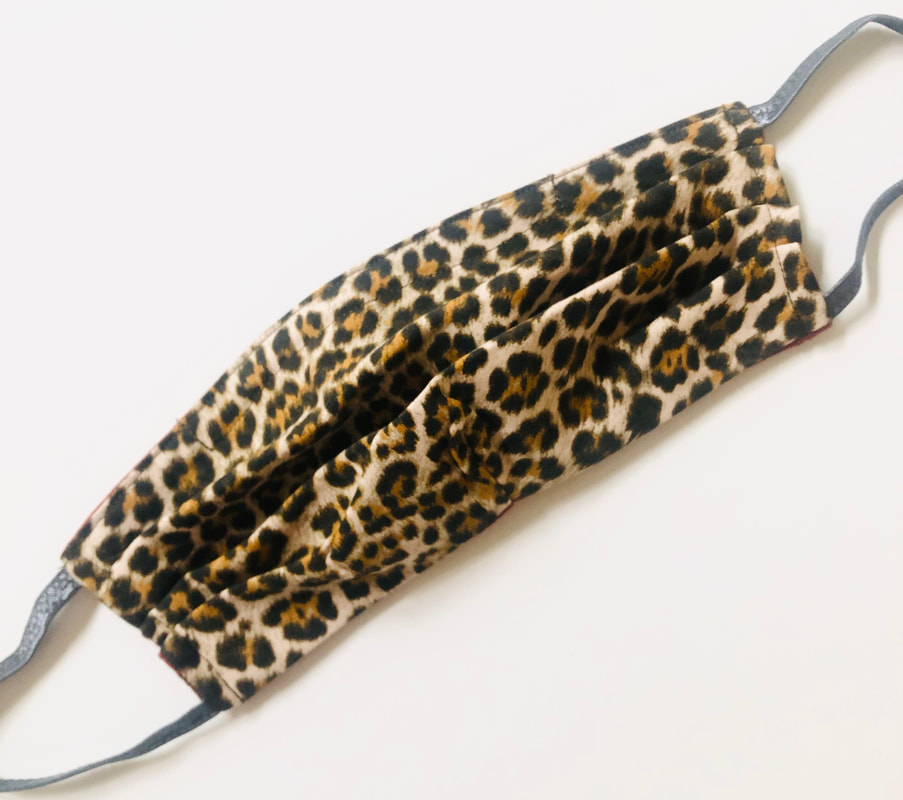 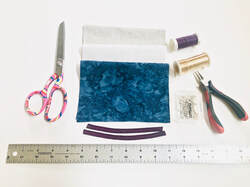 What you'll need:
Two 7” pieces of 1/4 inch elastic or similar. You can make two sizes: Adult (shown) or Child 7.5 x 5.
Does anyone know where January and February went? It seems like I've been cleaning and organizing since I took my holiday decor down and now it's March! The new year brings the best intentions, it inspires a cleaning and organizing frenzy for me, that if nothing else takes me through my home slowly but surely. Starting with the closet under the staircase that houses all my holiday decor, then moving to desk drawers (oh, that feels so good when it's organized and clean) into my studio organizing gemstones and my work bench, then finally to the Master closet.
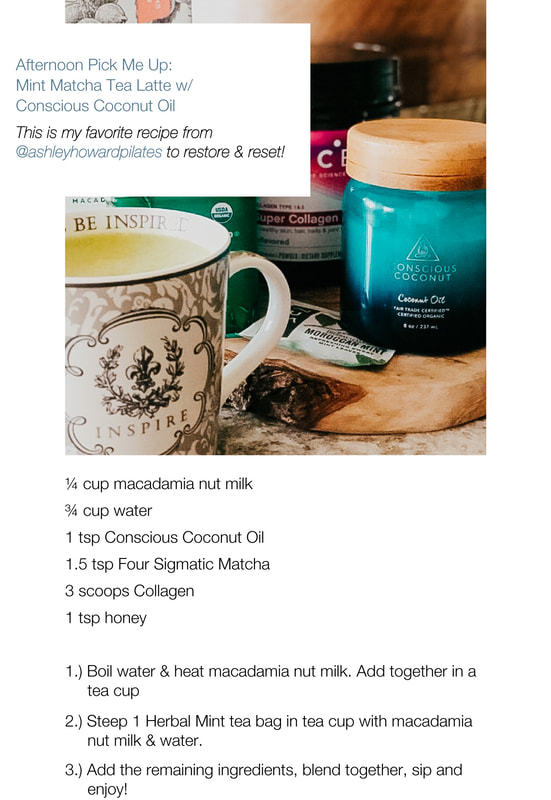
When working with clients to organize their closets or cleaning out my own I love Mari Kondo and use her "sparks joy" method to some extent, although keeping some items that are sentimental or clothing that may not quite fit at the moment (working off that holiday cheer), in hopes that I'll be wearing again soon is fine with me. So what do we do with those items we're getting rid of? Landfill, Donate or Recycle? I rarely toss anything in the trash unless it's so worn out no one can make use of it and I love to thrift (it's amazing what people donate, right?). Here are a handful of my favorite places to donate, consign or recycle! Click on the links I've provided in the names to learn more... DONATE 1. March 8 was International Womens Day and Dress For Success is an organization that dresses women for job interviews. If you have professional clothing, jewelry and accessories your not using any longer this is truly a wonderful source to help out. 2. The Salvation Army is a non-profit that will pick up donations or you can drop off at your nearest location and while your at it do a little shopping. We find many fabulous new pieces from Zara, Target and other well known brands! Don't forget your receipt for a tax write off! 3. A Homeless Shelter: Our local one in SCV partners with a Thrift store that we can donate to and they'll give vouchers to the homeless to go shop there. Call your local shelter to find out where to donate to. Tax deductible. CONSIGN 4. For luxury designer items you can consign and make a little extra dollars. The Real Real is perfect for your designer pieces. You can send them items and they photograph, post and sell or if you're in the LA area they now have a store you can visit! 5. Do it yourself consign... use Poshmark for Cabi, Lululemon, Michael Kors, Free People, Coach moderate priced pieces seem to do well here. You will need to upload the App, take photo's and post them along with regularly checking in, but once you get the hang of it it's not to bad. You will also need to ship the items, so check and see if you think this is right for you. CASH OR TRADE-IN 6. For trendy and vintage clothing there is usually a Buffalo Exchange and they're good for getting cash back or credit to the store. Each store varies greatly as to what they'll accept so double check online or with the store first! Every city I travel to I will scope out their BE and visit! We have good ones here in Ventura, Sherman Oaks and Hollywood. I have found some amazing designer pieces there as well. My daughters use BE quite often! Great in college towns. RECYCLING 7. Denim Recycling @ Madewell stop by one of their stores with your pre-loved pairs. They'll keep them out of landfills by turning them into housing insulation for organizations like Habitat for Humanity—and give you $20 off new ones.* 8. Habitat for Humanity While you may not be able to donate certain items like mattresses, Habitat Restores generally accept a variety of items. For instance, used household items and home goods from kitchenware to cabinets are just a few of the types of donations you can offer a Habitat ReStore. Most gently used items can either be donated, recycled or repurposed. Now let's get to clearing out and make space before spring gets here! Xo, Zoé 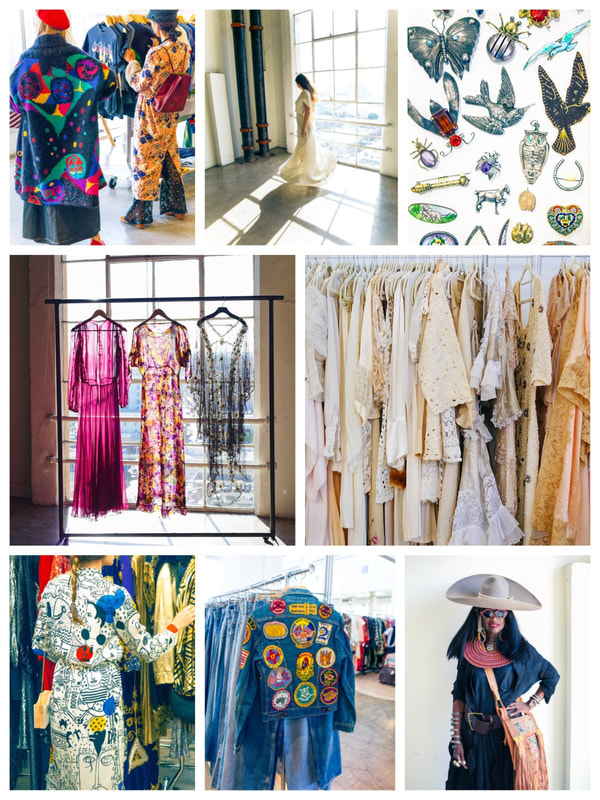 Here it is April already and there is NEVER a shortage of activities to choose from when you live in Los Angeles(or near by).
This weekend April 7th & 8th there is a handful of prospects and yet not enough time to do it all! Besides my weekly chores (Trader's Joes, clean the house and bathe the dogs) there is Dwell on Design at the LA Convention Center, Tomatomania at Descanso Gardens and for all you vintage lovers A Current Affair Pop Up at the Cooper Design Building downtown as well!! You probably already guessed....I have my ticket and have chosen not to miss the vintage eye candy pop up, A Current Affair! I guess I'll just have stay up a bit later to clean the house and pups will have to wait a day to be fluffy. Oh well... Xo Zoé 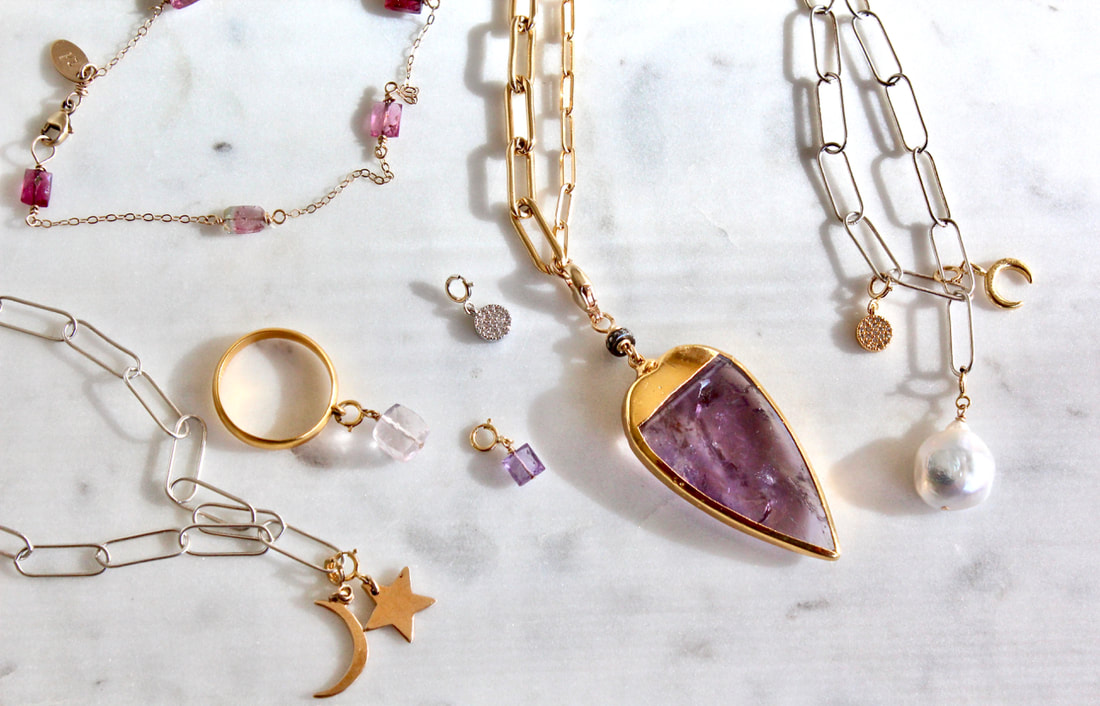 February is a lovely month isn't it? January zips right by and all of a sudden, boom. It's February and Valentine's Day! Amethyst is the gemstone of the month. From a deep purple to a pale lavender it's powerful and protective, transmitting energy into love. A natural tranquilizer it blocks stress and negative energies. If your giving a gift of jewelry for this day of love, Amethyst might be the way to go (wink, wink). Click on the photo above and it will take you to New Arrivals for a few ideas for jewelry giving this month. For us on Valentine's day there is nothing more romantic than an evening at our home. Fireplace going, candles lit, a fabulous meal and a Rom Com (probably Shall We Dance)! Yes, it may sound a bit corny, but we like it that way. The best part of our meal is dessert. A chocolate one that is and here is our favorite. The Spiced Molten Chocolate Cake from The Organic Kitchen. Oh, it is so delicious I do hope you'll try it... Linda's recipes are a staple in our home and I always look to her blog or Pinterest pages when I need inspiration in the kitchen! Click the link to get the recipe ;D This evening, relax,light some candles, and savor every moment. Happy Valentine's Day! Xo Zoé  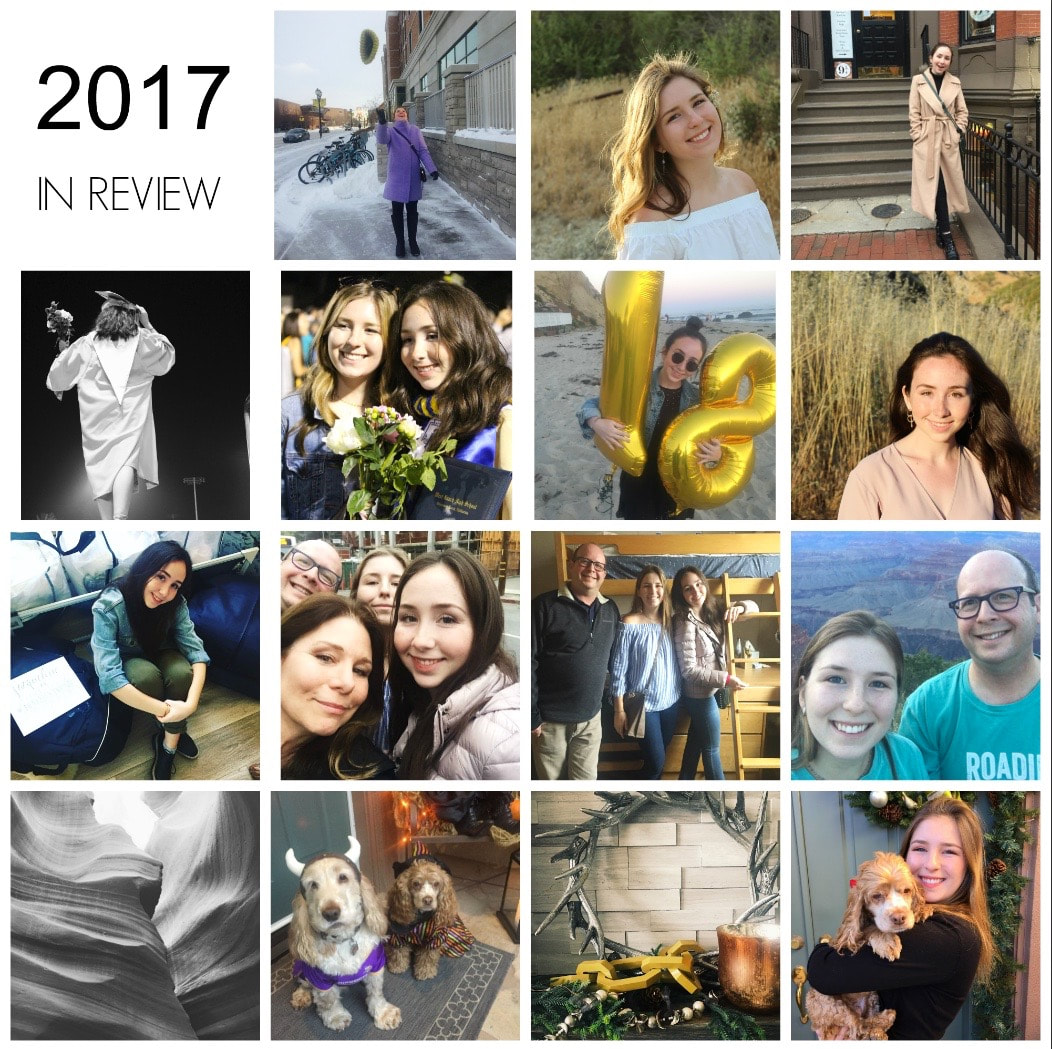 2017 had a few milestones for our family... Celia made the move from North Carolina to Minnesota, Jacqueline graduated high school with honors and in June turned 18. She chose to stay in California after touring many colleges back east (Yay, she's close!). Ron and Celia did a week long road trip back to Minnesota seeing every site and landmark (the Corn Palace anyone?) before starting her junior year. Now, Ron and I are so called "empty-nesters"...except of course, for our two fur babies, Tami and Bailey. Lastly, on December 28th, 2017 Celia turned the big 21! I still can't believe that.
January 2018, the girls headed back to school after a month long break and I am have returned to my studio to continue creating jewelry, booking trunk shows (#havejewelswilltravel) and styling and packing for clients! I'm so thankful to each of you (my family, friends and clients) for your friendship, your patronage, your encouragement and your support... it means the world to me. This past year I have enjoyed designing so many custom works of art and hope the jewelry you bought or gave will bring happiness and positive energy for many years to come. With gratitude & love... Xo, Zoe & Family 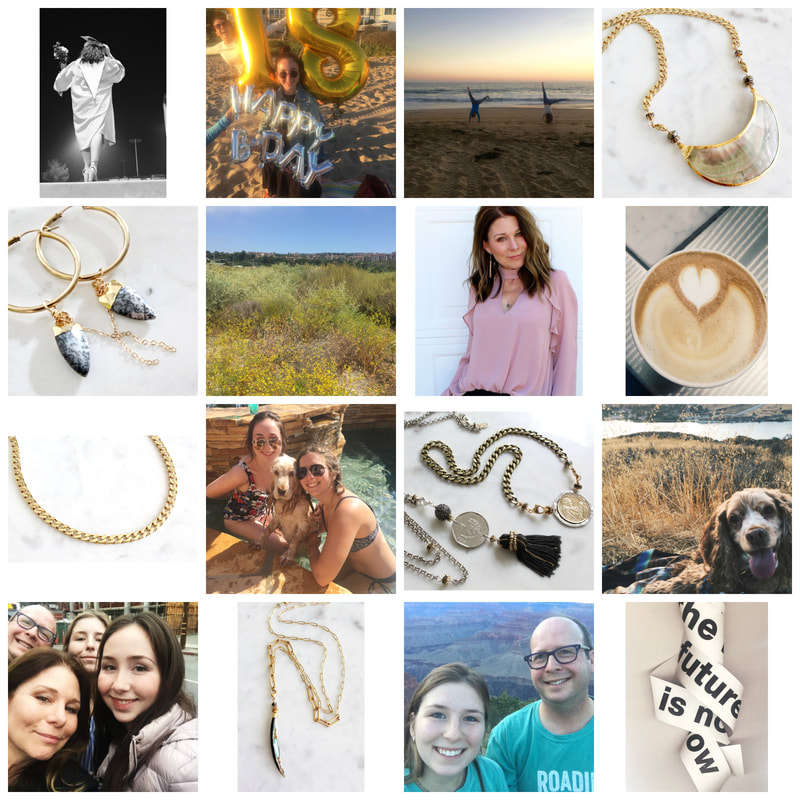 The past eight months have been quite the journey for us. I can hardly believe it's been that long...
Moving Celia to a new college in MN, college applications and tours, senior prom then graduation, milestone birthday(s), moving Jacqueline to UC Berkeley (Go Bears!) and a father-daughter 10 day road trip back to Minneapolis. Not to mention a complete renovation of our home floors, keeping up with my designing for my line and custom work, then picking up a bit of sewing with my dear friend whom I've know since my San Diego days. She now has a fabulous shop called Mavencraft Studios and needs all kinds of "Mavens" to create beautiful costumes for film, stage and television. That has been incredibly humbling and rewarding... After 21 years, we're back to just the two of us (I feel a song coming on) and of course those two adorable fur babies. New adventures and chapters for us all (With any luck, I can now start to post on a regular basis). Now, it's time to celebrate! Don't you think? Enjoy 20% Off Your next purchase online at www.zoedufour.com Redeem by Saturday, September 16,2017 Code: EMPTYNEST Check back soon for some fall inspiration... XO
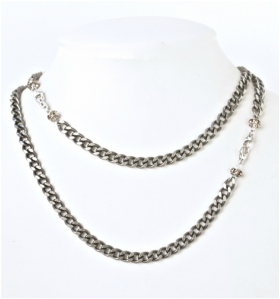
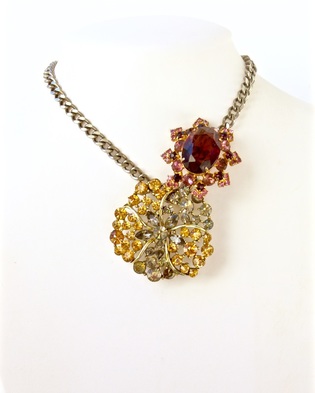
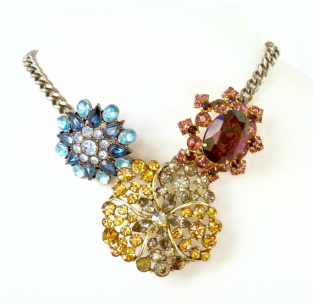
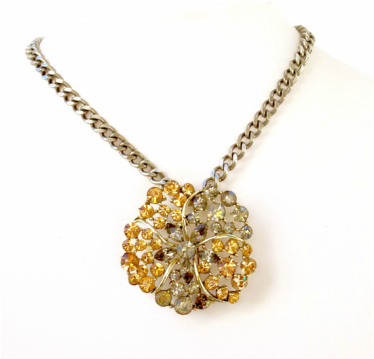 Step 1. Lay the chain flat, then fold in have to find the center. Step 2. Taking the largest brooch weave the pin through the center link in the chain and clasp. At this point I would try it on to make sure it feels and looks right.
Step 3. Moving to the second pin, place it slightly overlapping the center pin and gauge the links you’ll need to weave it through. Usually 2 or 3 links is good. Clasp the pin, then move on to… 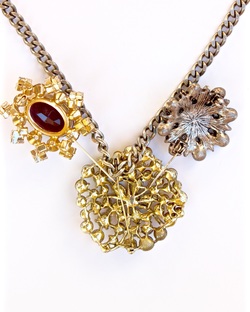 Step 4. With the 3rd pin repeat step 3 on the opposite side. Weaving the brooch pin back through a few links then close the brooch.
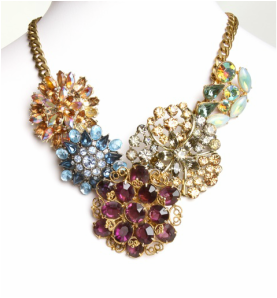
Now it’s time to try on your new statement necklace. I like to move a bit just to make sure it’s going to stay where I want. Make any adjustments to the balance of the brooches if you need to. Sometimes it takes a couple of tries but what accomplishment you feel when it’s done and you can wear those gorgeous pieces! The best part is you’re not changing the integrity if they’re vintage. Option 2If you don’t want a “Statement” piece and would prefer something a bit more understated this is for you.  Using a heavy chain, this time my Vintage Brass Curb Chain because it has two clasps, you can use the clasp of the necklace to pin to either side of the brooch. 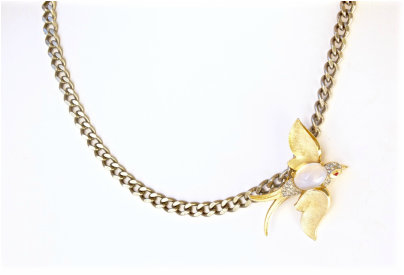 Or, weave the pin thorough a few of the links, try on, adjust for balance if you need to. Fini. Now enjoy those gorgeous pieces! 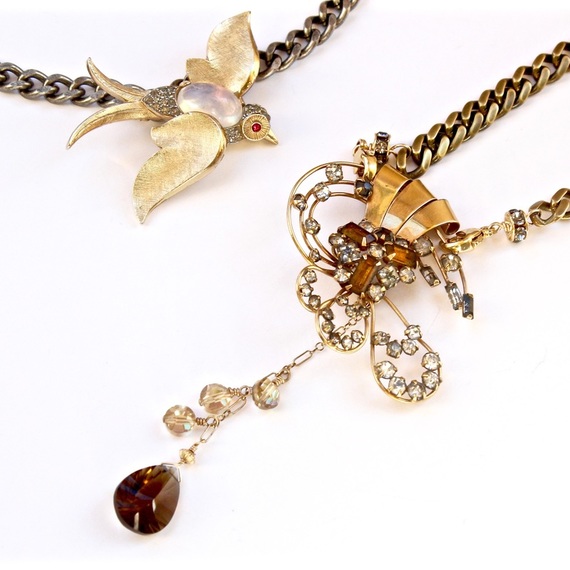  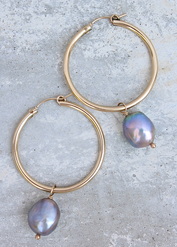 Although my birthday is not in June, I've always had a love affair with pearls. Not the perfect round, white ones (although equally amazing) but the organic shaped pearls... with color. Iridescent grey, beautiful bronze, or pale pink. From the small keishi pearl to the large baroque pearl I am enthralled by them all. Each one is unique. Each one a work of mother nature. Whether you decide to dress them up or dress them down it is guaranteed that you will be making a statement. Almost everyday, whether I am going to the mall with my girls or simply going grocery shopping, I find myself wearing my beloved Platinum Pearl Earring Charms with my gold hoops... perfect considering grey is this years neutral (but that's another post!). 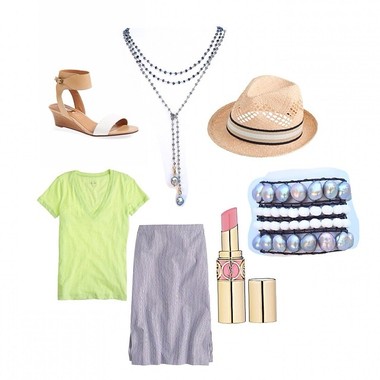 For a day trip to the beach I like to pair these pearls with my Gemstone Convertible Lariat necklace (at the ends are charms), a colorful linen tee , seersucker pencil skirt (all J. Crew), Pearl and White Onyx Stacking Bracelets (Zoé DuFour), straw fedora (J. Crew), nude sandals (Nordstrom), and the softest shade of pink for lips (YSL) for an easy breezy summer look.  For night I'm loving my Coin Pearl Cuff and the colorful Capri Linear Earring Charms (Zoé DuFour) paired with a fabulous black jumpsuit (BCBG MAXAZZARIA Neiman Marcus), White Jacket (Zara), and a Gold Clutch (Loeffler Randall Piperlime).  Zoé DuFour, here. If you haven't already read about me on my about page or on the side bar, I would just like to formally welcome you to my new blog. I will be trying to post as often as I can; however, with my hectic life (and I know I'm not the only one) I may be limited on time. Nonetheless, I know you will find inspiration in my posts that will range from a delish recipe to my fashion must haves. The best is yet to come!
XO, Zoé |
My Website

The woman behind it all
My name is Zoe DuFour and... Yes, I am the woman behind it all. You will find that this blog is for those who love good food, fashion, and humor.
Archives
April 2020
|